How to charge and monitor lithium batteries?
Enhancing your caravan 12V system
With lithium batteries now the clear choice for the lovers of free camping, many caravan owners upgrade their 12V system to make it lithium compatible. But how do you charge your new batteries when on the road and how you monitor lithium batteries power usage when using high loads? A range of BMPRO products can enhance your RV 12V system, and one of our customers, John Hilton, shares his experience in installing these products.
John is a happy owner of 2020 Jayco Silverline 21.65-3 and have earlier upgraded to J35D power management system with 2 Invicta 125Ah Lithium batteries – perfect combination for free camping in comfort. That’s his story:
Installation of MiniBoostPRO, BC300 and Commlink
I have finally completed the rewiring of the batteries in my Silverline, including the install of the MiniBoostPRO, BC300 Shunt and CommLink I purchased from BMPRO at the Caravan Show in Melbourne in February.
The MiniBoostPRO now gives me a clean charge feed to my lithium batteries rather than relying on the feed from the car, and the BC300 reports all usage, even high current draw, rather than having things like inverters bypassing the current draw reporting.
Here are my installation steps and details:
- I have a separate 8B&S cable from drawbar to under the bed for power from the car.
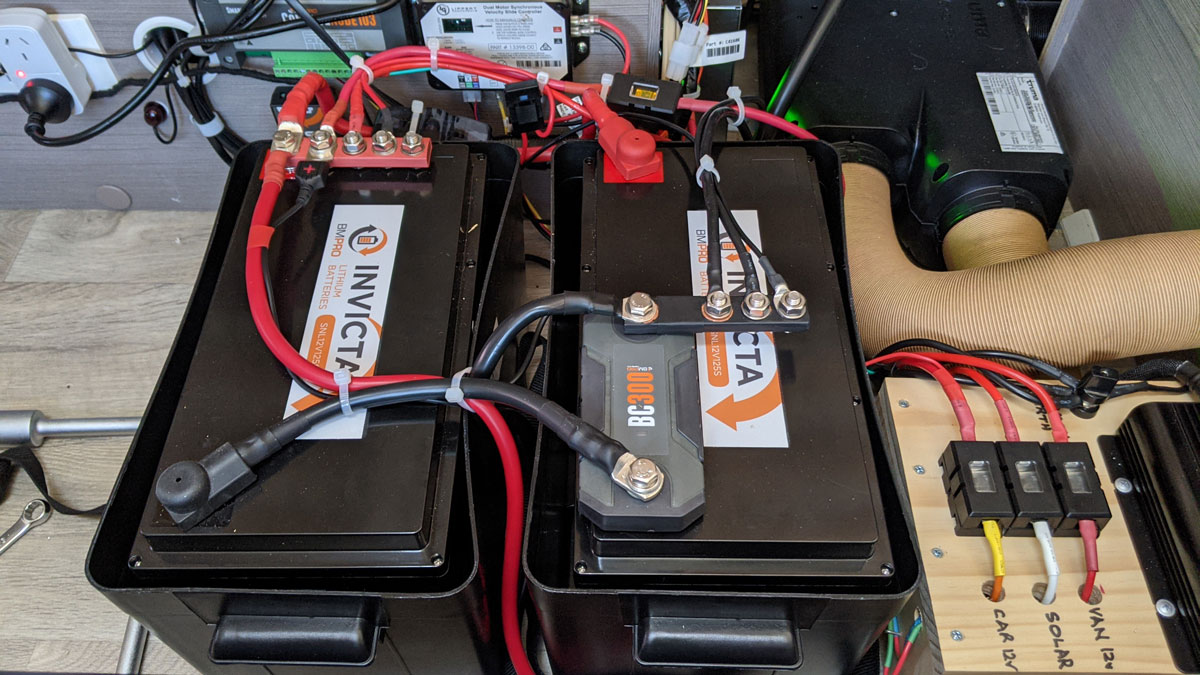
- I moved the batteries from the left to the right side under the bed.
- I connected the Battery Negative Terminals using 2B&S Cable. Note the Negative is terminated on the Battery Post on top of the BC300 on Battery 2 as suggested by the BMPRO customer service team.
- I connected the Battery Positive Terminals using 2B&S cable with an inline 200A Mega Fuse.
- I made Positive and Negative BusBars using 100mm x 20mm x 8mm Copper Bars, shrink wrapped for some protection.
- I connected the BC300 to the Negative Terminal of Battery 2, and the Pos+ Flying Lead to the Positive BusBar on Battery 1.
- The CommLink is installed underneath the ControlNode103 and plugged into the spare port on the node as there are no spare ports on the J35D.
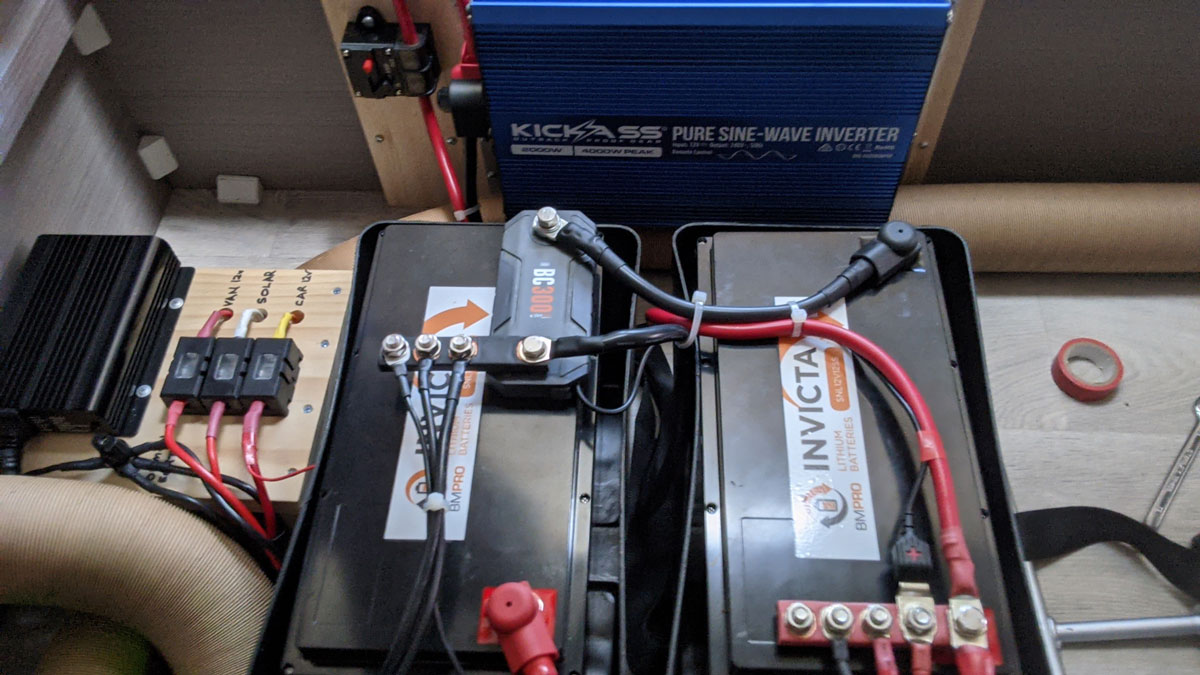
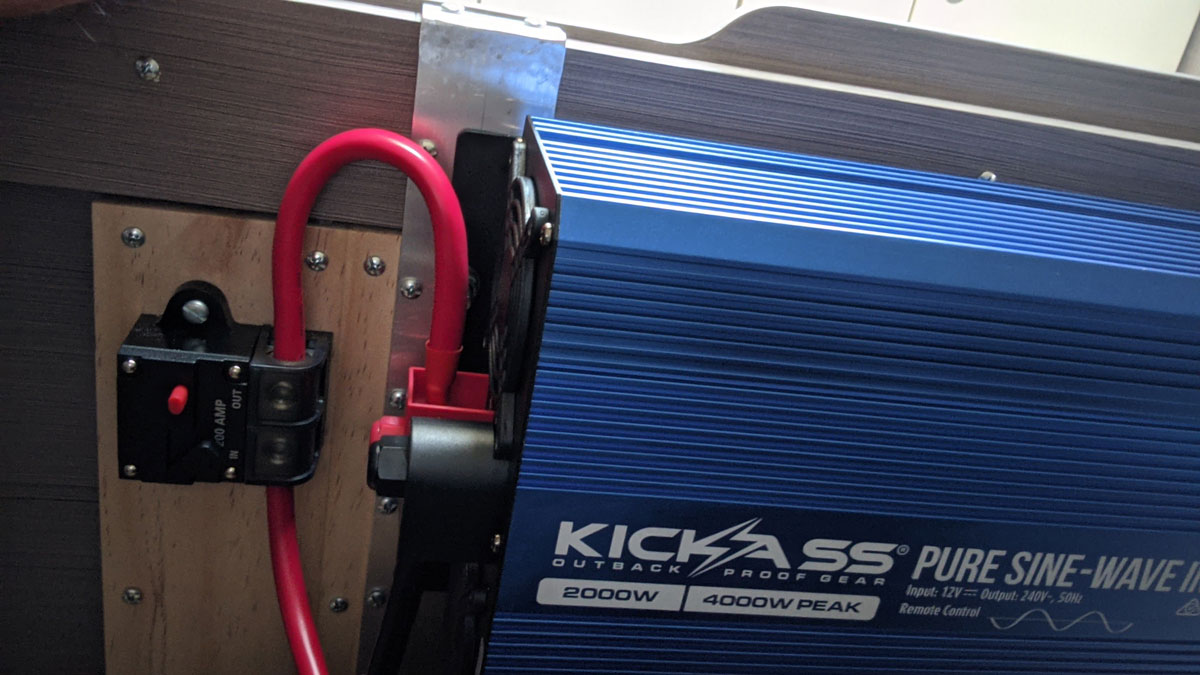
- The Kickass 2000W Inverter is wired using 3B&S Cable, with these cables connected on the Positive and Negative posts of Batteries 1 and 2 as was suggested.
- There is a 200A Circuit Breaker in the Inverter Pos+ line for obvious safety, but also so the inverter can be kept powered off when not in use.
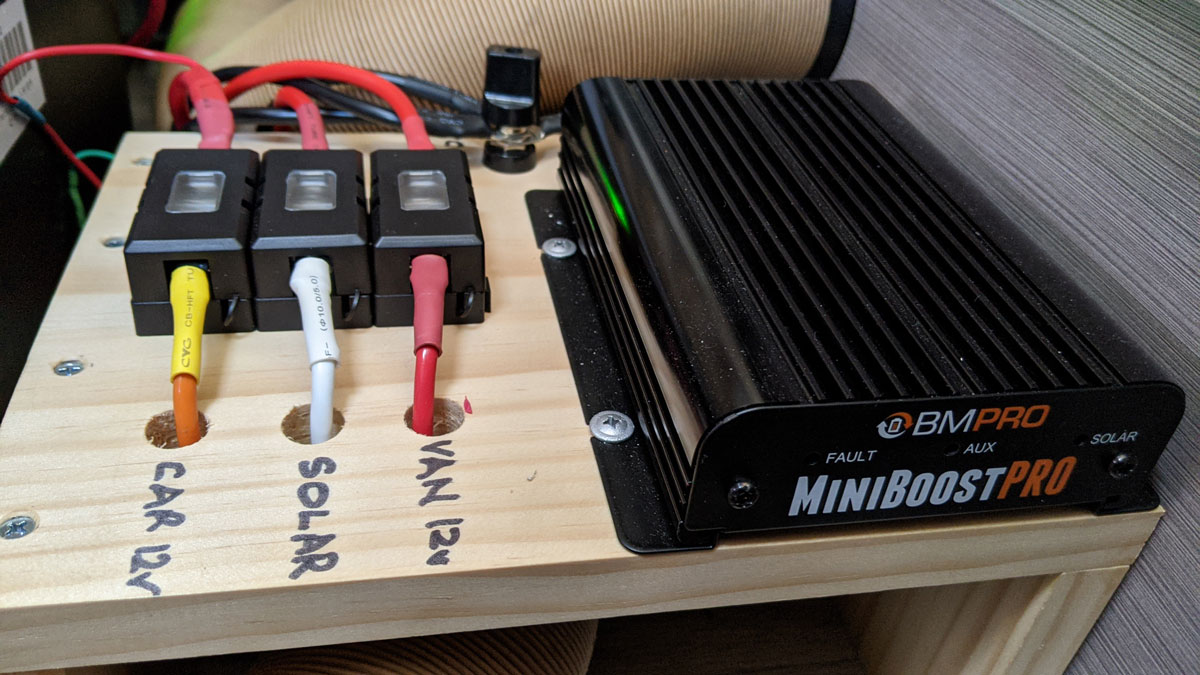
- I made a frame to Install the MiniBoostPRO on, lifting it above the heater ducting, along with the required 40A fuses and a Common Earth post.
- The 8B&S Cable coming from the vehicle comes into the 40A fuse marked ‘Car 12v’ then is connected to the Orange cable on the MiniBoostPRO.
- For Portable Solar I have installed an Anderson plug externally on the van, with 8B&S cable coming into the 40A fuse marked ‘Solar’ then connected to the White cable from the MiniBoostPRO.
- The red cable from the MiniBoostPRO goes through the 40A fuse marked ‘Van 12v’ and then to the Batteries via 8B&S Cable. Aux in the J35D is being used so couldn’t terminate there.
- All Negatve Cables associated with the MiniBoostPRO are terminated on the Common Earth post at the rear of the MiniBoostPRO.
- Other cables attached to the BusBars are Pos and Neg cables from the MiniBoostPRO, the J35D and the Breakaway system.
- The Green Battery Chemistry wire passes through a 2A fuse and is connected to the Pos terminal on Battery 1.
- The Blue ignition trigger wire passes through a 2A fuse and is connected to the cable coming into the 40A fuse marked Car 12v as suggested (I have a 2nd battery and isolator in the vehicle).
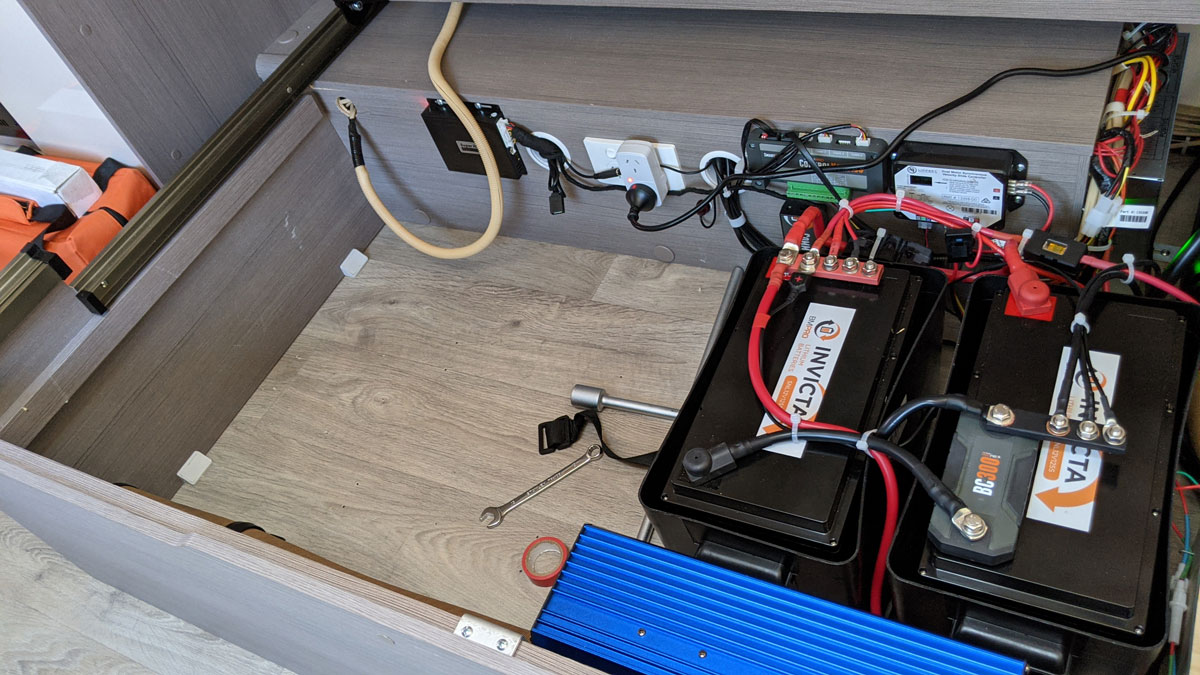
I have included a picture showing how this change has made available at least half the under-bed area for further storage. There also was quite a lot of cable left over once I completed the rewiring – amazing!
I took a video of the JHub as my wife cranked up her hairdryer through the Inverter. The BC300 did its job and the JHub quickly reported 156 Amps being drawn from the batteries. BC300 helps monitor lithium batteries when using high current loads – super valuable.
Like this Post? Share it!