Key Features
- Battery voltage & charge status
- Battery charging & discharging currents
- Auxiliary & solar charging currents
- Time remaining to discharge
- Level indication of up to 4 water tanks
- Water pump status
- The battery on/off status

![]()
![]()
The ability to configure battery chemistry is available only if the Trek3 is in use with the BatteryPlus35-HA or BatteryPlus35-II-HA, which are capable of charging both lead acid and LiFePO4 type batteries.
By default, the BatteryPlus35-HA and BatteryPlus35-II-HA are configured to charge lead acid batteries. This can be changed with the Trek3 monitor.
To configure the BatteryPlus35-HA or BatteryPlus35-II-HA to charge LiFePO4 batteries with the Trek3 monitor:
- Enter Set-Up mode by holding the HOME button down until Set-Up is seen on the Battery display.
- Navigate to the ADVANC menu function.
- Navigate to the BATCHM menu function.
- Follow the directions in the below image to configure the battery chemistry:

The battery capacity needs to be set whenever a new battery is fitted to the BatteryPlus35-II. By default, the battery capacity is set to 100AH.
Correctly configuring the battery capacity ensures that the BatteryPlus35-II will select the best charging parameters for the caravan battery in use and the software accurately estimates battery usage including Battery Capacity and Time Remaining.
Enter Set-Up mode and navigate to the batCaP menu function. Follow the directions in the image below to configure the battery capacity. The battery capacity can be adjusted between 50 and 600AH in steps of 10AH.
The time on the Trek3 may be set in either 12- or 24-hour formats.
12-Hour Format
- Enter Set-Up mode by holding the HOME button down until Set-Up is seen on the Battery display.
- Navigate to the Clock menu function.
- Follow the directions in the below image to set the clock in 12-hour format:

The AM and PM indicators will automatically change as the hour changes from 11 to 12.
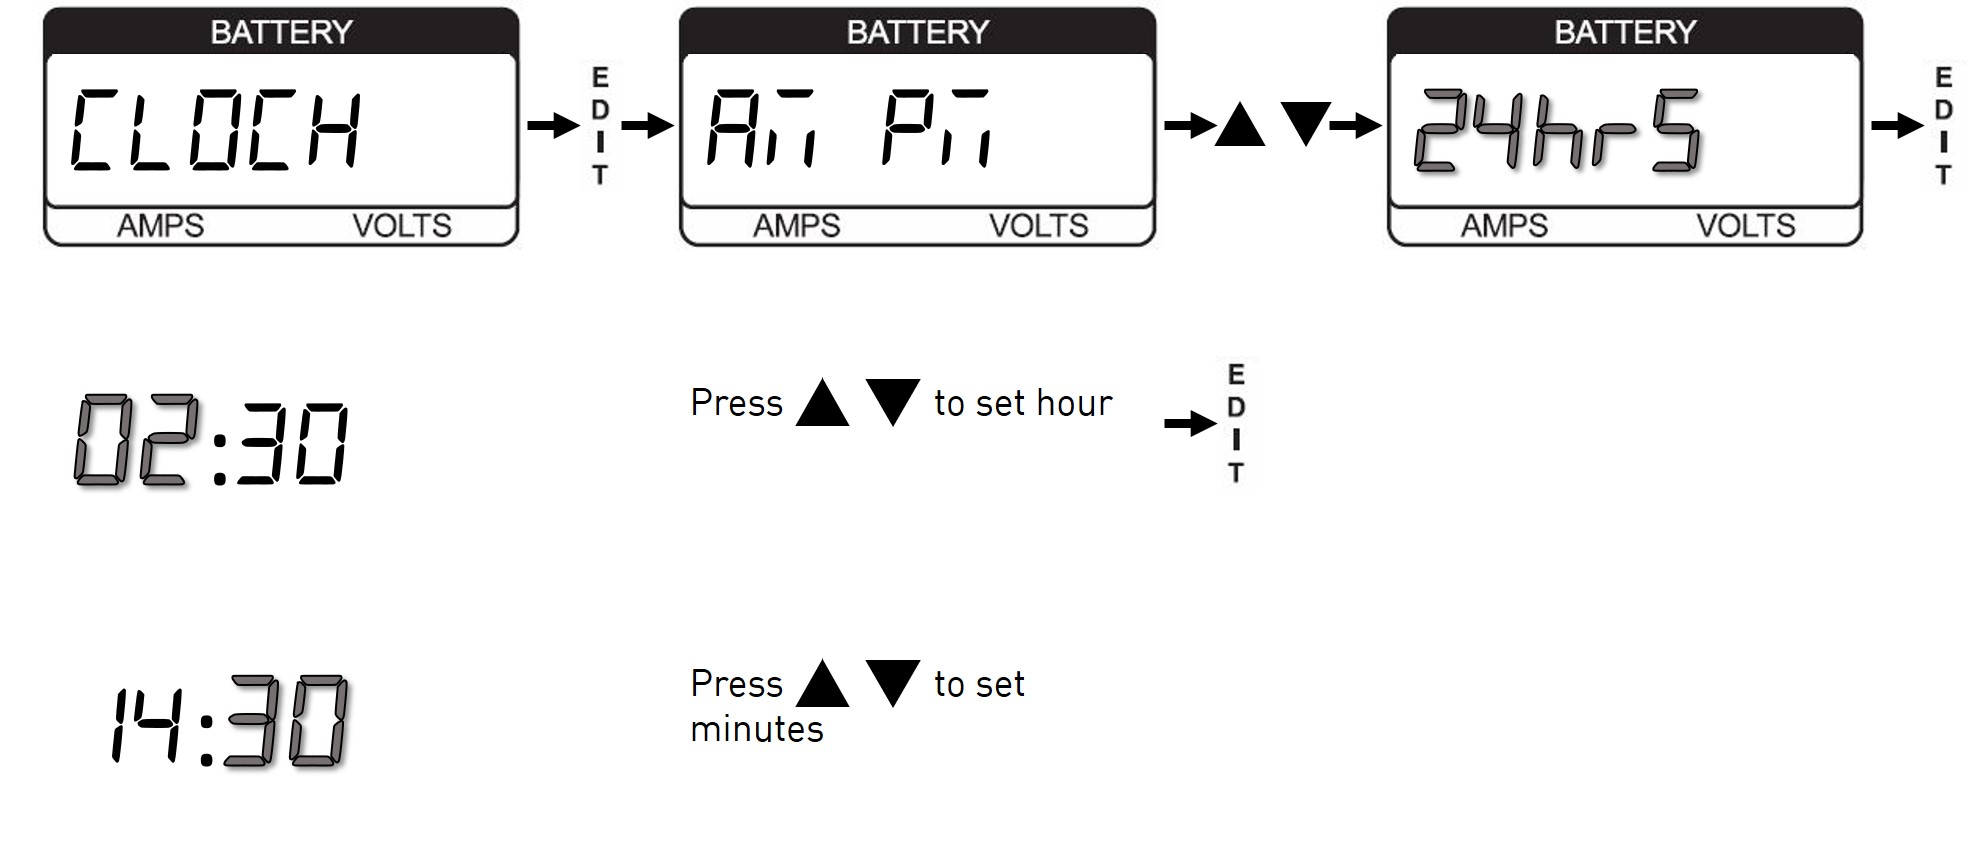
24-Hour Format
- Enter Set-Up mode by holding the HOME button down until Set-Up is seen on the
Battery display. - Navigate to the Clock menu function.
- Follow the directions in the below image to set the clock in 24-hour format: